Tuesday 30 November 2010

Creating food stuffs in clay.


L10

WALT;              How to create food shapes in 3D.

WILF;                All of you will be able to manipulate the clay.
                                  Most of you will demonstrate a reality in the work.
                                  Some of you will be able to work quickly by working as a team..

Using various methods (demonstrated last lesson) like  a clay gun with filters to make spaghetti for example you were to design your own food shapes in 3D

Food types made included spaghetti / chips/ burgers/ mushrooms/sausages/pasta/pizza.


Clay food will be fired in the kiln for next week.

Safety,       remember!

All moisture to be ejected from the clay when in the kiln otherwise there is a risk of explosion.

Art; Working in clay

Lesson 9

An introduction to working with clay, theme;   Fantastic Food .

WALT                      How to create a 3D surface

WILF                       All of you can work rolling the clay.           
                                  Most of you will also understand how to shap the clay.            
                                  Some of you will do this but remember your listening skills.            

You were shown how to use different tools and different methods to create different types of foods

You were shown how to make each individual food types with the tools required.

You were told that you could make any food type you wanted and shown how to make spaghetti/cheese/bacon etc by flattening the clay and drawing the food stuff on it.


This would take up at least 3 lessons.


Making the plate.


Making the food stuff.


Painting the clay


You were also told about the firing process and how important it is to remove all air from inside the clay before it goes in the kiln.


Firstly you had to make the plate on which the food would sit.


Here are the images of your efforts.


Art Lesson 7 Continued Mood boards


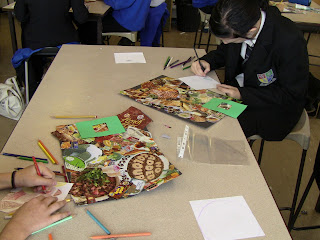
This lesson continued with your mood board BUT this time you had to take out a small section and enlarge.


Here are images to remind you of this lesson.


ART Lesson 4


This was to make accurate observations, keeping with the fantastic food theme.

Here we are interested in food wrappers.


The objective for the lesson were provided by;

WALT                        How to record my observations accurately


WILF                          Quality of drawing.

                                          1 All of you obtained a food wrapper and could make a drawing.

                                          2 Most of you produced an accurate drawing.

                                          3 Some of you produced an accurate drawing and noticed the
                                             differences in tone, texture and colour and remembered how to mark
                                             make.


Even though you had already produced accurate drawings this lesson helped you improve your
drawing skills.            

By the end of the lesson you had revisited pencil line drawing and mark making with objects that had 
organic forms.


This work would help you go on to create mood boards with the theme of organic food stuffs.

Theory.

Light and form create different shapes.

Lettering motifs appear abstract.

Abstract drawing is;

Theoretical rather than concrete or physical, denoting  an idea, quality, or state.

For your understanding and continuing your learning journey you investigated abstract art that does not attempt to represent external, recognisable reality.

Recap.

You sat and observed the food wrapper you were to draw.

Drawing crushed tin cans and crumpled up crisp packets. 

Looking for light, form & shade which create shape.


As usual at the end you had to showcase your work and relate to each other , with reasons based on theory, which piece you thought managed to fulfil the lessons objective.


How do you think you did?

Monday 29 November 2010

Mask Characters.


The learning levels of the mask character lesson are to further help you to develop physical skills in Drama.

 The levels you were introduced to and tried to achieve were;


Level 3c Explain rules of mask work.

Level 3b Take on the role of the character with a mask.

Level 3a Be able to work with others to show a range of emotions.


The lesson order was split into 4 tasks


Task 1 Pass the focus


Task 2 Pass the emotion.


Task 3 Mask characters


Task 4 Waiting room  


Sunday 28 November 2010

Commedia Dell Arte Characters investigation.


This work was to help you understand a threatre style which in our case was Commedia dell Arte.


To help you with youe learning these levels were introduced.


Level 3c  List key characters in Commedia dell Arte.

Level 3b  Take on the role of a character.

Level 3a Be able to work with others to show two ranges of characters.


The lesson was split into 4 tasks.

Task 1  Character carousel


Task 2  Character tableau


Task 3  Add caption


Task 4 Waiting room.

Thursday 18 November 2010

Art; Miss McNulty Head of Art input

Overview


To start, we created drawings from observation.

We used slices of orange that provided circles and triangles to draw, and the texture of the orange flesh was difficult for some people to draw.


We drew some broccoli, which a lot of students felt was like drawing trees!!!!!!


We have collected exisiting images of food packaging and used them as inspiration for our fantasitc food. We have looked at their lettering and the colours and images. These provided inspiration to create drawings of favourite foods


We have made our plates this week from clay. It looked so much easier that it actually was! Next we are going to make the food from clay.